
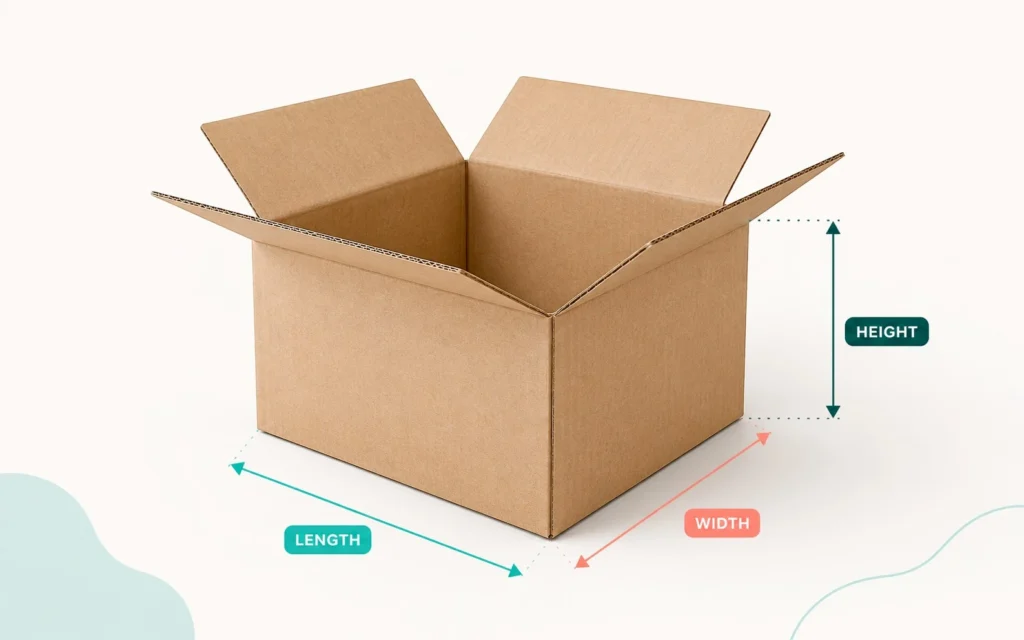
A box can look perfectly fine on a desk and still be the wrong size for production. A quarter-inch error may affect product fit, inserts, closing panels, shipping space, or the final dieline. The safest approach is to measure in a consistent order, separate internal dimensions from external dimensions, and share the product measurements along with the box size.
Key Takeaways
- Write box dimensions in the standard order: Length × Width × Height.
- For a rectangular box, length is usually the longest side of the opening, width is the shorter side, and height runs from the base to the top.
- Use internal dimensions when the goal is product fit; use external dimensions when planning shipping, shelving, storage, or pallet space.
- Measure the actual product at its widest, deepest, and tallest points, including permanent caps, pumps, handles, or attached parts.
- Do not guess extra clearance. Share the exact product, insert, and packing requirements so the structure can be adjusted correctly.
What Order Are Box Dimensions Written In?
Box dimensions are normally written as Length × Width × Height, often shortened to L × W × H. Keeping this order consistent prevents a supplier, designer, warehouse team, or shipping platform from interpreting the same three numbers differently.
How to Measure a Box in 5 Simple Steps
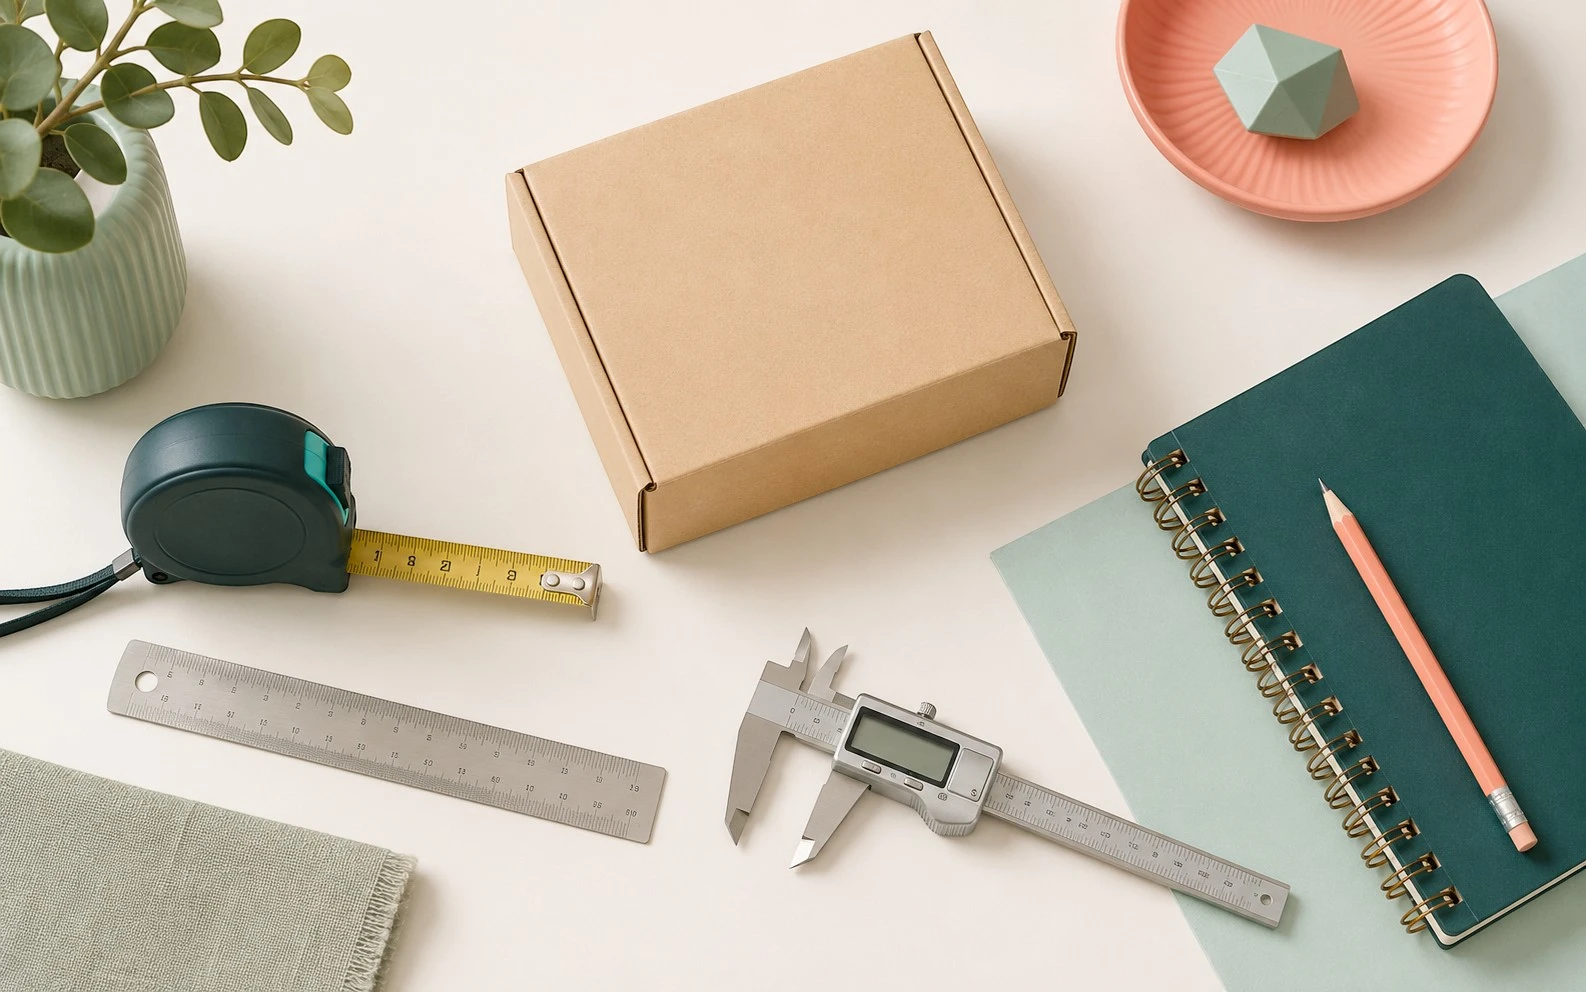
Use a firm ruler or measuring tape, place the box on a flat surface, and square the corners before you begin. If the box is crushed, bowed, or partly folded, reshape it first or use an undamaged sample.
Decide whether you need inside or outside measurements
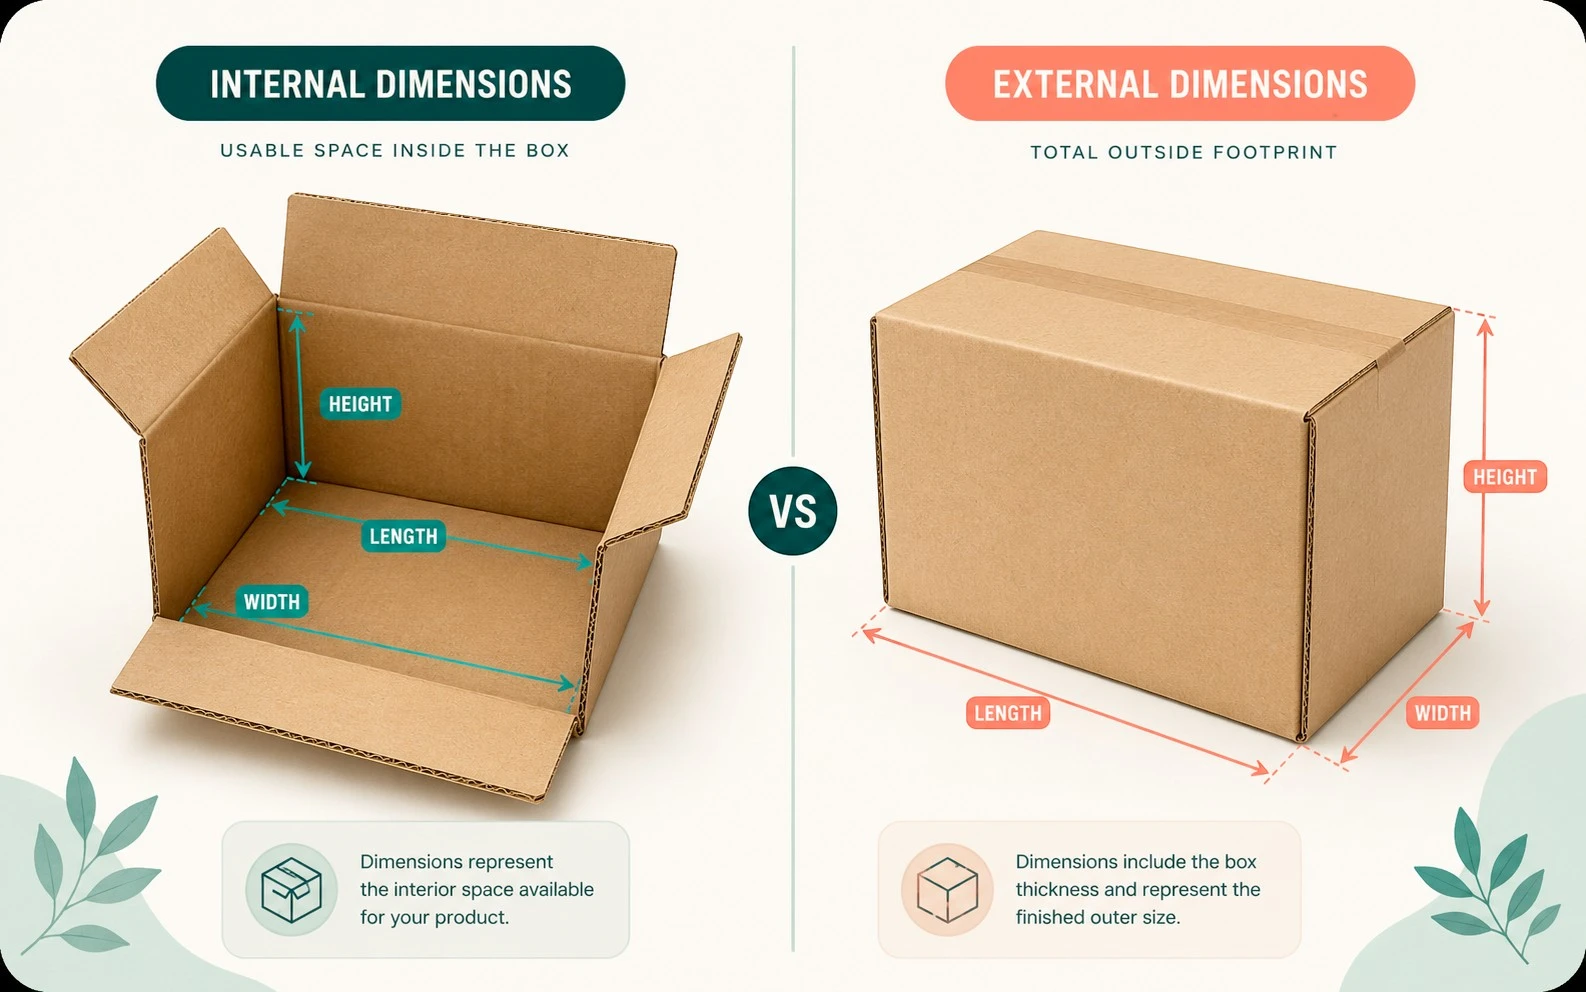
For custom packaging, product fit normally starts with the usable interior. For shipping labels, warehouse space, and outer cartons, the outside footprint is usually more relevant.
Measure the length
Look across the opening and identify the longer side. Measure from one inside edge to the opposite inside edge when recording internal dimensions.
Measure the width
Measure the shorter side across the opening. Keep the tape level and avoid measuring diagonally from corner to corner.
Measure the height
Measure vertically from the inside base to the top edge. For a lid-and-base box, confirm whether the lid depth is being quoted separately.
Write the unit and measurement type
Record the result as, for example, “12 × 8 × 4 in, internal.” Including inches or millimeters and the word internal or external removes unnecessary guesswork.
Internal vs External Box Dimensions
The difference between internal and external box dimensions is small on thin paperboard and more noticeable on corrugated or rigid packaging. Material thickness, wrapped edges, folded panels, liners, and inserts all reduce the usable space inside the finished box.
| Measurement type | What it describes | Best used for | Important note |
|---|---|---|---|
| Internal dimensions | The usable space inside the assembled box. | Product fit, inserts, dividers, retail packaging, custom manufacturing. | Usually the better starting point when ordering packaging around a product. |
| External dimensions | The longest outside measurement from edge to edge. | Shipping rates, master cartons, shelves, storage bins, pallets, fulfillment planning. | Includes the board and construction thickness. |
| Product dimensions | The product’s maximum length, width, and height. | Structural design, insert cavities, clearance, orientation, protection. | Measure the finished sellable product, not only the main body. |
How to Measure Your Product for Custom Packaging
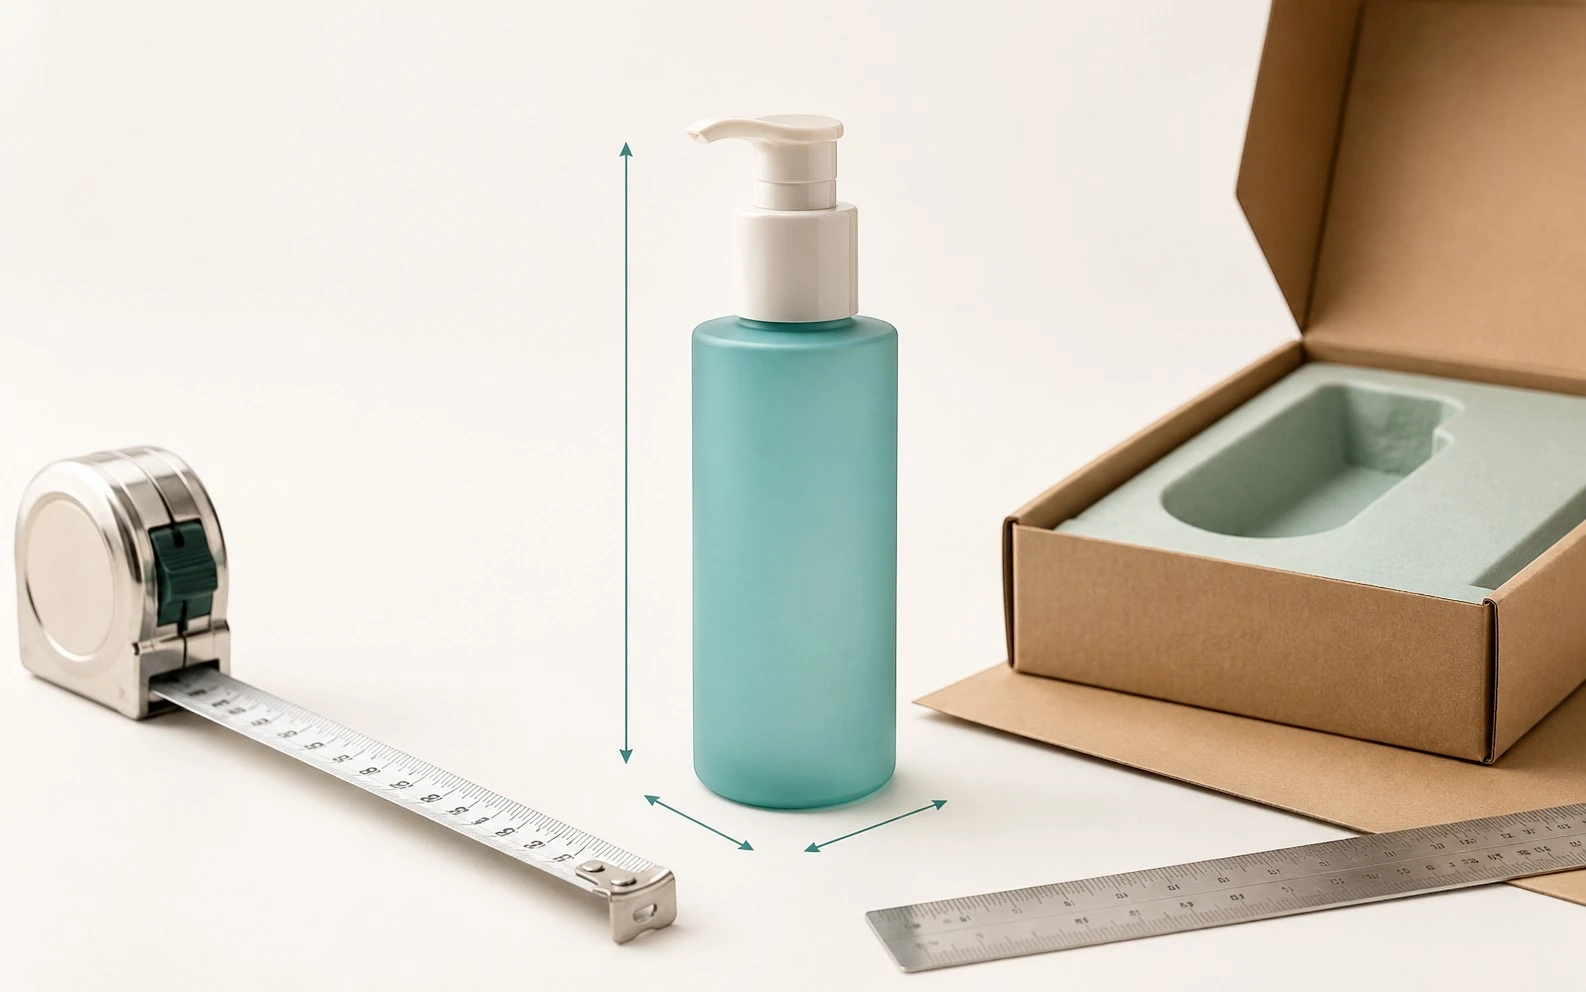
When the packaging is being made around a product, the product is the real starting point. Place it in the same position it will use inside the final box. Then measure the maximum distance in each direction rather than measuring only the neatest or narrowest part.
Product length
Measure the longest horizontal distance from one end of the product to the other in its intended packing position.
Product width
Measure the maximum side-to-side depth, including any curve, shoulder, hinge, or part that extends beyond the main body.
Product height
Measure from the lowest contact point to the highest permanent point, including closures and dispensing parts.
Weight and fragility
Dimensions alone do not determine the structure. Product weight, breakability, surface finish, and shipping conditions affect the material and insert choice.
Should You Add Extra Space Around the Product?
A small amount of functional clearance may be needed so the item can be packed and removed without damaging the product or box. However, there is no single clearance number that works for every project. A folding carton, corrugated mailer, rigid gift box, foam insert, and paperboard tray all behave differently.
Instead of increasing each dimension yourself, send the exact product measurements and explain how you want the product to sit. The packaging team can account for board thickness, folds, closures, tolerances, wrapping, cushioning, and insert construction when preparing the dieline.
Measuring Inserts, Multiple Products, and Irregular Shapes
Simple rectangular products are easy to describe with three numbers. Kits, bottles, curved objects, and products with accessories require a little more information.
Products with inserts
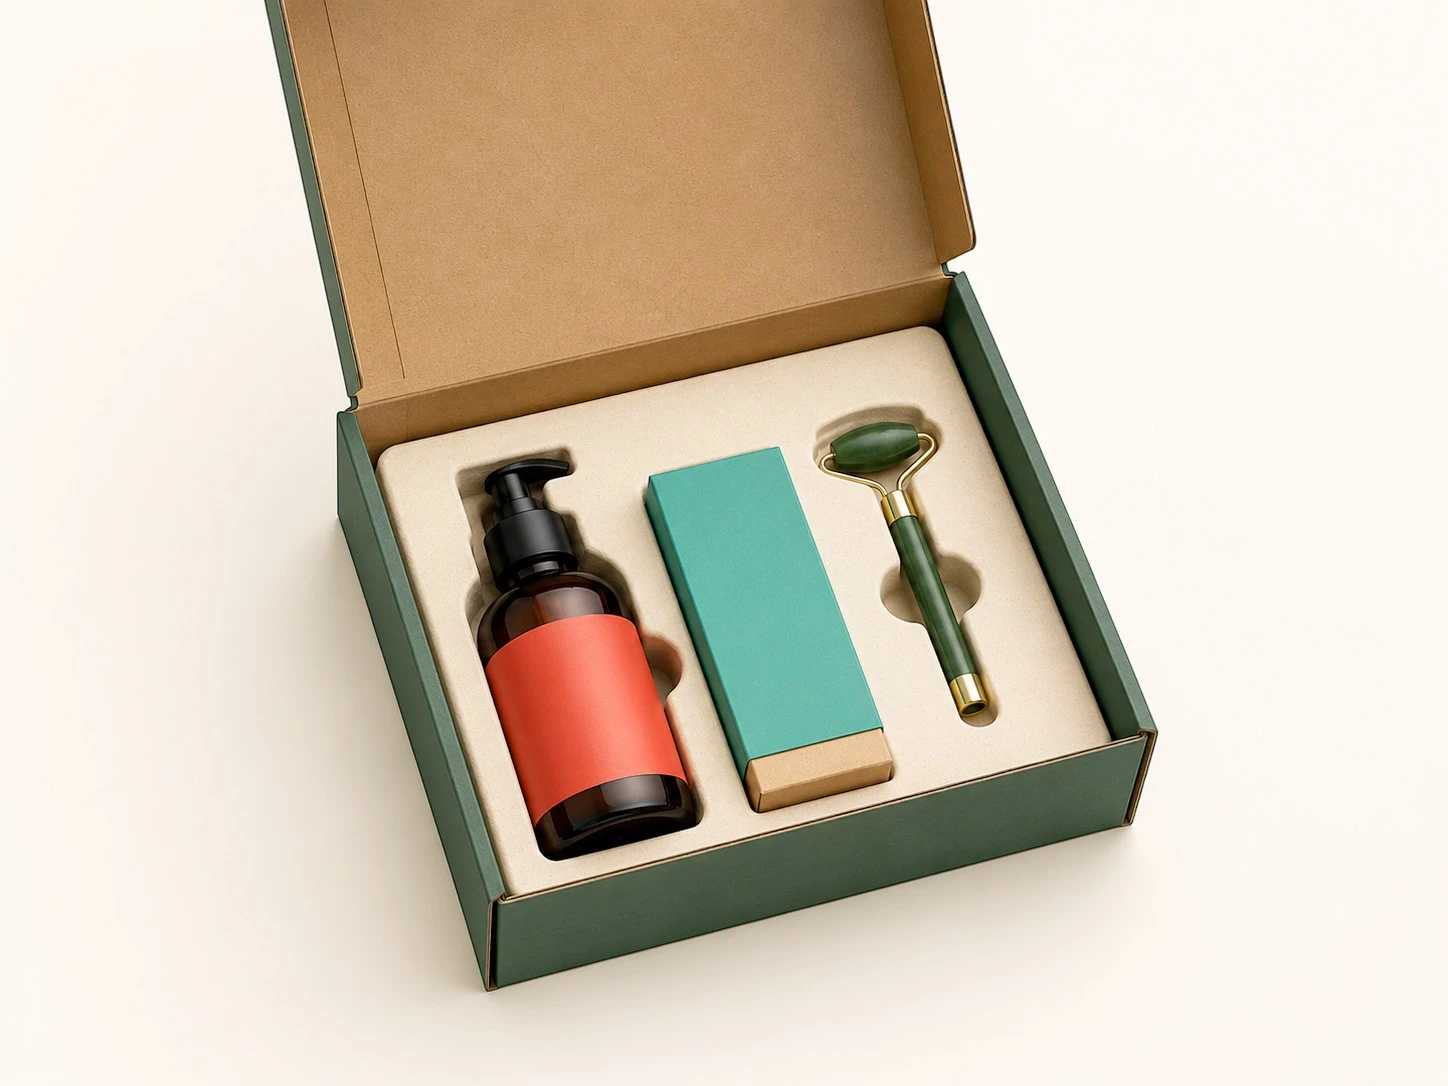
Measure every item separately. Share the desired arrangement, the number of cavities, and which surfaces should remain visible when the box opens.
Multi-product kits
Do not measure only the combined pile. Provide individual measurements and a photo or sketch showing the planned layout and spacing.
Irregular products
Imagine the smallest rectangular envelope that completely surrounds the item. Measure the maximum length, width, and height of that envelope.
For fragile, high-value, or unusually shaped products, a physical sample is often more reliable than numbers alone. It allows the packaging structure and insert to be checked against the actual object rather than an idealized measurement.
Cartor also creates custom boxes with inserts for single products, sets, and presentation kits where fit and product organization are important.
How Box Style Changes the Measurement
The same product may need different finished dimensions depending on the structure. A mailer box has folding walls and dust flaps. A folding carton has tuck panels and score lines. A rigid box may use wrapped board and a separate lid. A shipping carton may need cushioning around the product.
Folding cartons
Best for many lightweight retail products. The structural designer must account for folds, tuck panels, glue areas, and board caliper.
Mailer boxes
Useful for ecommerce and branded unboxing. Rolled edges, front locks, side walls, and insert trays influence the usable cavity.
Rigid boxes
Wrapped board, lid clearance, shoulder pieces, magnets, and insert depth can change both the interior and exterior size.
Shipping boxes
Protection may require corrugated walls, cushioning, dividers, or an inner retail box, so the shipping carton is normally larger than the product itself.
How to Measure a Box for Shipping
When measuring a box for shipping, use the finished package after it has been packed and closed. Measure the longest outside distance in each direction, including any bulge, raised flap, handle, or protruding part. Shipping systems and carriers use the package’s outer footprint, not the internal cavity.
Keep the tape straight, measure at the widest points, and record the values in the order requested by your carrier or shipping software. Carrier pricing and rounding rules can change, so confirm the current requirements before buying a label for a large or unusually shaped parcel.
Why Right-Sized Packaging Matters
A box should leave enough room for the product, the insert, and any necessary protection—but not so much room that the item moves freely or the packer has to fill large empty areas. The right size creates a cleaner presentation and makes the packaging specification easier to repeat across production runs.
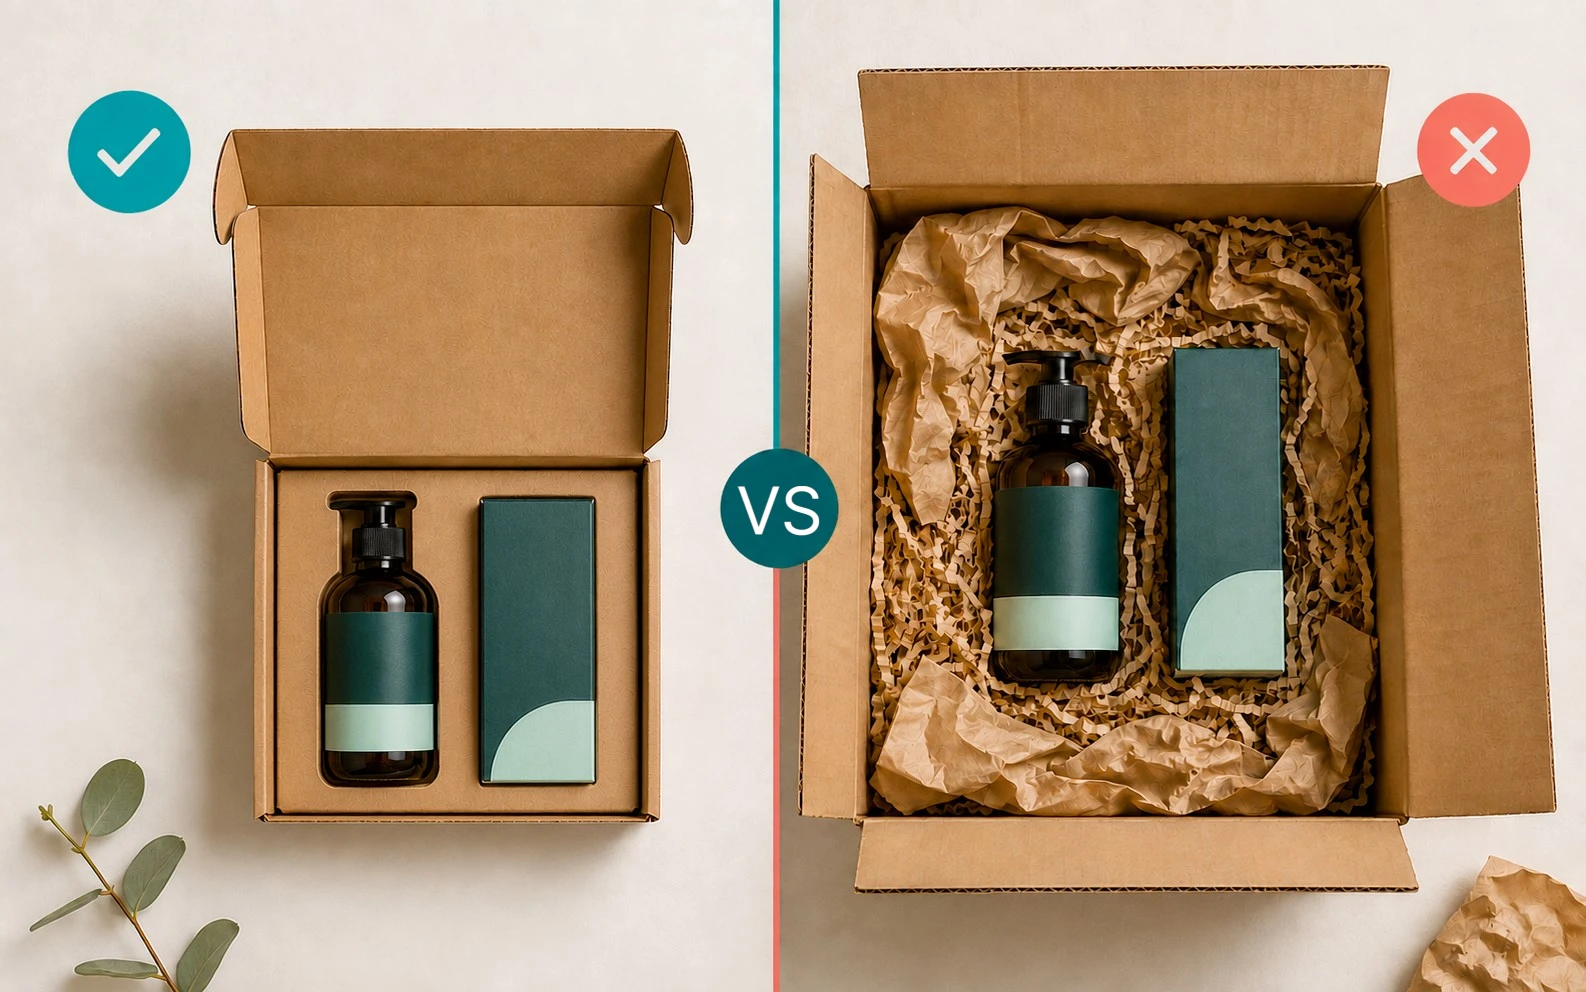
For online orders, explore Cartor’s custom ecommerce boxes, including mailers, shipping boxes, and packaging with fitted inserts.
Common Box Measurement Mistakes to Avoid
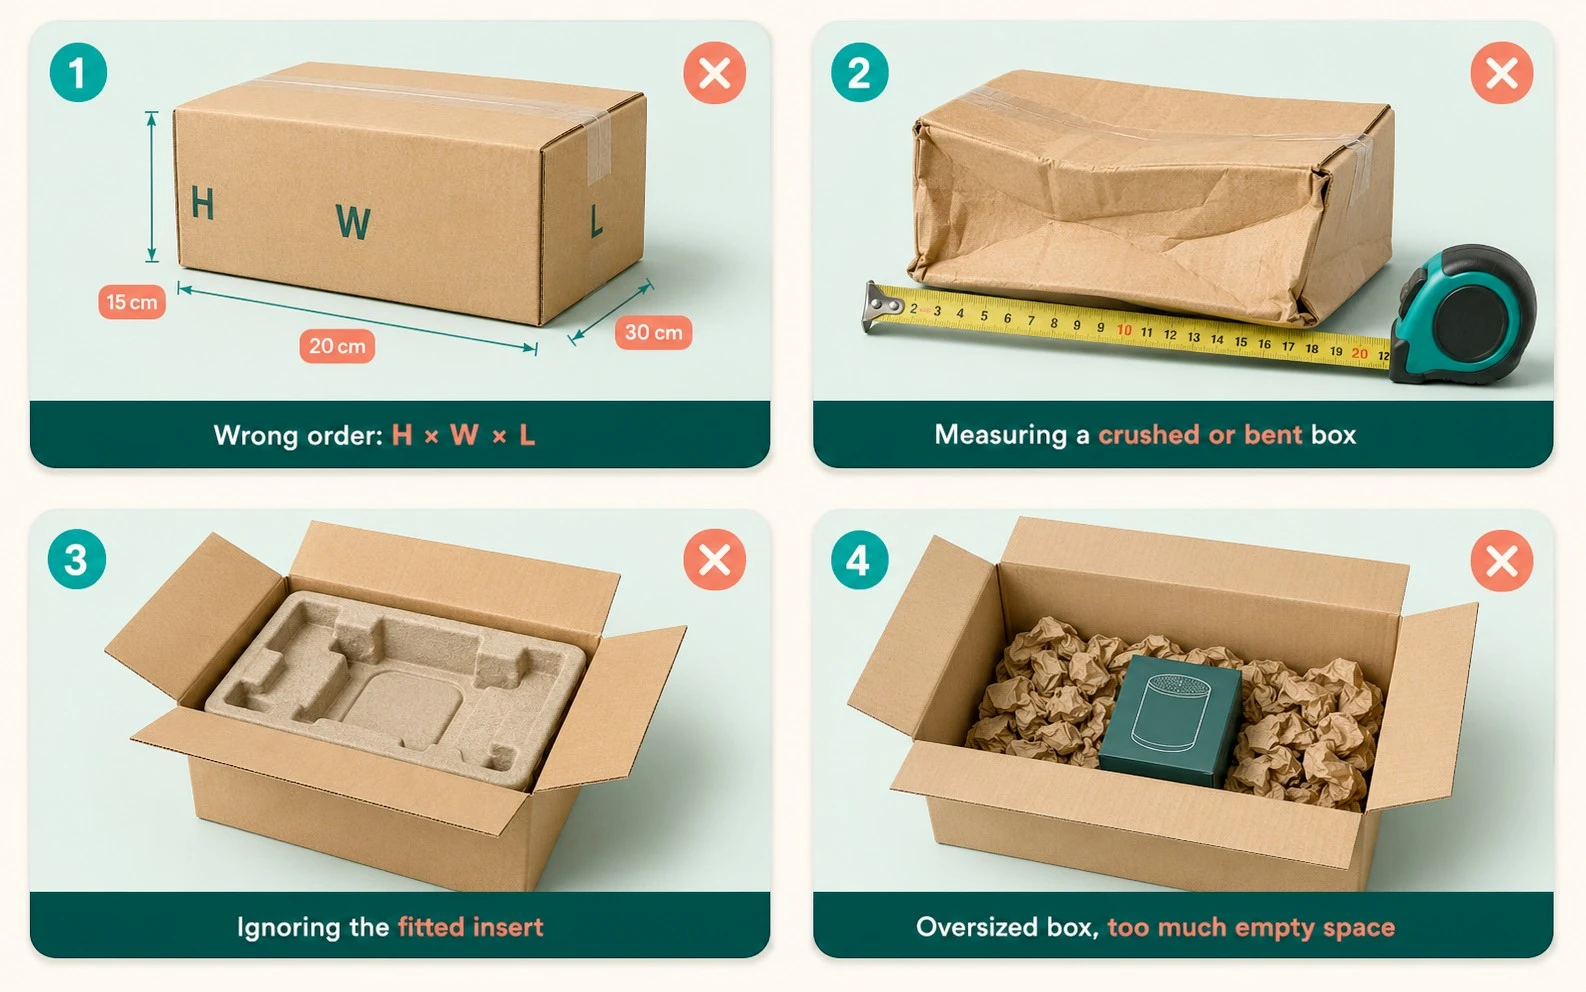
- Changing the dimension order: writing W × H × L without clearly labeling the numbers.
- Mixing inside and outside measurements: especially when copying dimensions from an existing shipping carton.
- Measuring a damaged sample: crushed corners and bowed panels produce unreliable results.
- Ignoring permanent product parts: caps, pumps, hinges, handles, cables, and accessories must be included.
- Forgetting the insert: the insert occupies space and may change the required box depth.
- Adding an arbitrary margin: too much guessed clearance can create movement and unnecessary volume.
- Leaving out the unit: always state inches, centimeters, or millimeters.
- Rounding too early: keep the original measurement until the packaging team confirms production tolerances.
Box Measurement Examples
| Situation | How to record it | What else to provide |
|---|---|---|
| Existing folding carton | 4.25 × 2.00 × 6.50 in, internal | Photos of all panels, product dimensions, and whether the new box should copy the structure. |
| Cosmetic bottle | 2.15 × 2.15 × 5.80 in, product size | Bottle weight, cap type, orientation, and whether an insert is required. |
| Three-piece gift set | Measure each item individually | A top-view layout sketch and the preferred unboxing arrangement. |
| Packed shipping carton | 14 × 10 × 6 in, external packed size | Actual packed weight, destination, carrier, and any protruding features. |
What to Send With a Custom Packaging Quote Request
Accurate measurements speed up structural planning and reduce back-and-forth. Send as much of the following information as possible:
- Product length, width, height, and weight
- Quantity of products packed in each box
- Preferred box style or a reference image
- Desired product orientation and opening experience
- Insert, divider, cushioning, or window requirements
- Order quantity, artwork, material, finish, and delivery location
Frequently Asked Questions
What comes first: length, width, or height?
Length comes first, followed by width and height. Write the measurement as L × W × H and include the unit.
Are box dimensions measured inside or outside?
It depends on the purpose. Custom packaging is commonly planned around internal dimensions and product measurements, while shipping and storage normally use external dimensions.
How do I know which side is the length?
For a standard rectangular opening, the length is usually the longer horizontal side and the width is the shorter horizontal side. The height runs vertically from the base to the top.
How do I measure a box for shipping?
Pack and close the box, then measure the longest outside distance in each direction. Include bulges, raised closures, handles, or other protruding parts, and follow the current instructions from your carrier.
Should I add extra space to my product dimensions?
Send the exact product dimensions first. The required clearance depends on the box style, material, closure, insert, packing method, and product tolerance, so it is better to let the structural team calculate it.
How do I measure an irregular-shaped product?
Measure the smallest imaginary rectangular space that fully contains the product. Record its maximum length, width, and height, and include photos from several angles.
What measurements are needed for a custom insert?
Provide each product’s dimensions, weight, shape, quantity, orientation, and the arrangement you want inside the box. A physical sample may be requested for products that need a very precise fit.
Can Cartor help if I am not sure about the final box size?
Yes. Share your product measurements, photos, quantity, preferred style, and protection requirements. Cartor can guide you through box sizing, dielines, artwork setup, mockups, inserts, and production planning.
Related Packaging Resources
Ready to Create Packaging That Fits Your Product?
Send Cartor your product measurements, preferred box style, quantity, artwork, material, insert, and finishing requirements. The packaging team can help refine the final size and prepare a custom quote with design and dieline support.
Get a Free Custom Packaging Quote